It is harder than it looks and requires a bit cleaning. It does look quite nice and fun!
I will quickly summarize what needs to be done, assuming you have watched the video above!
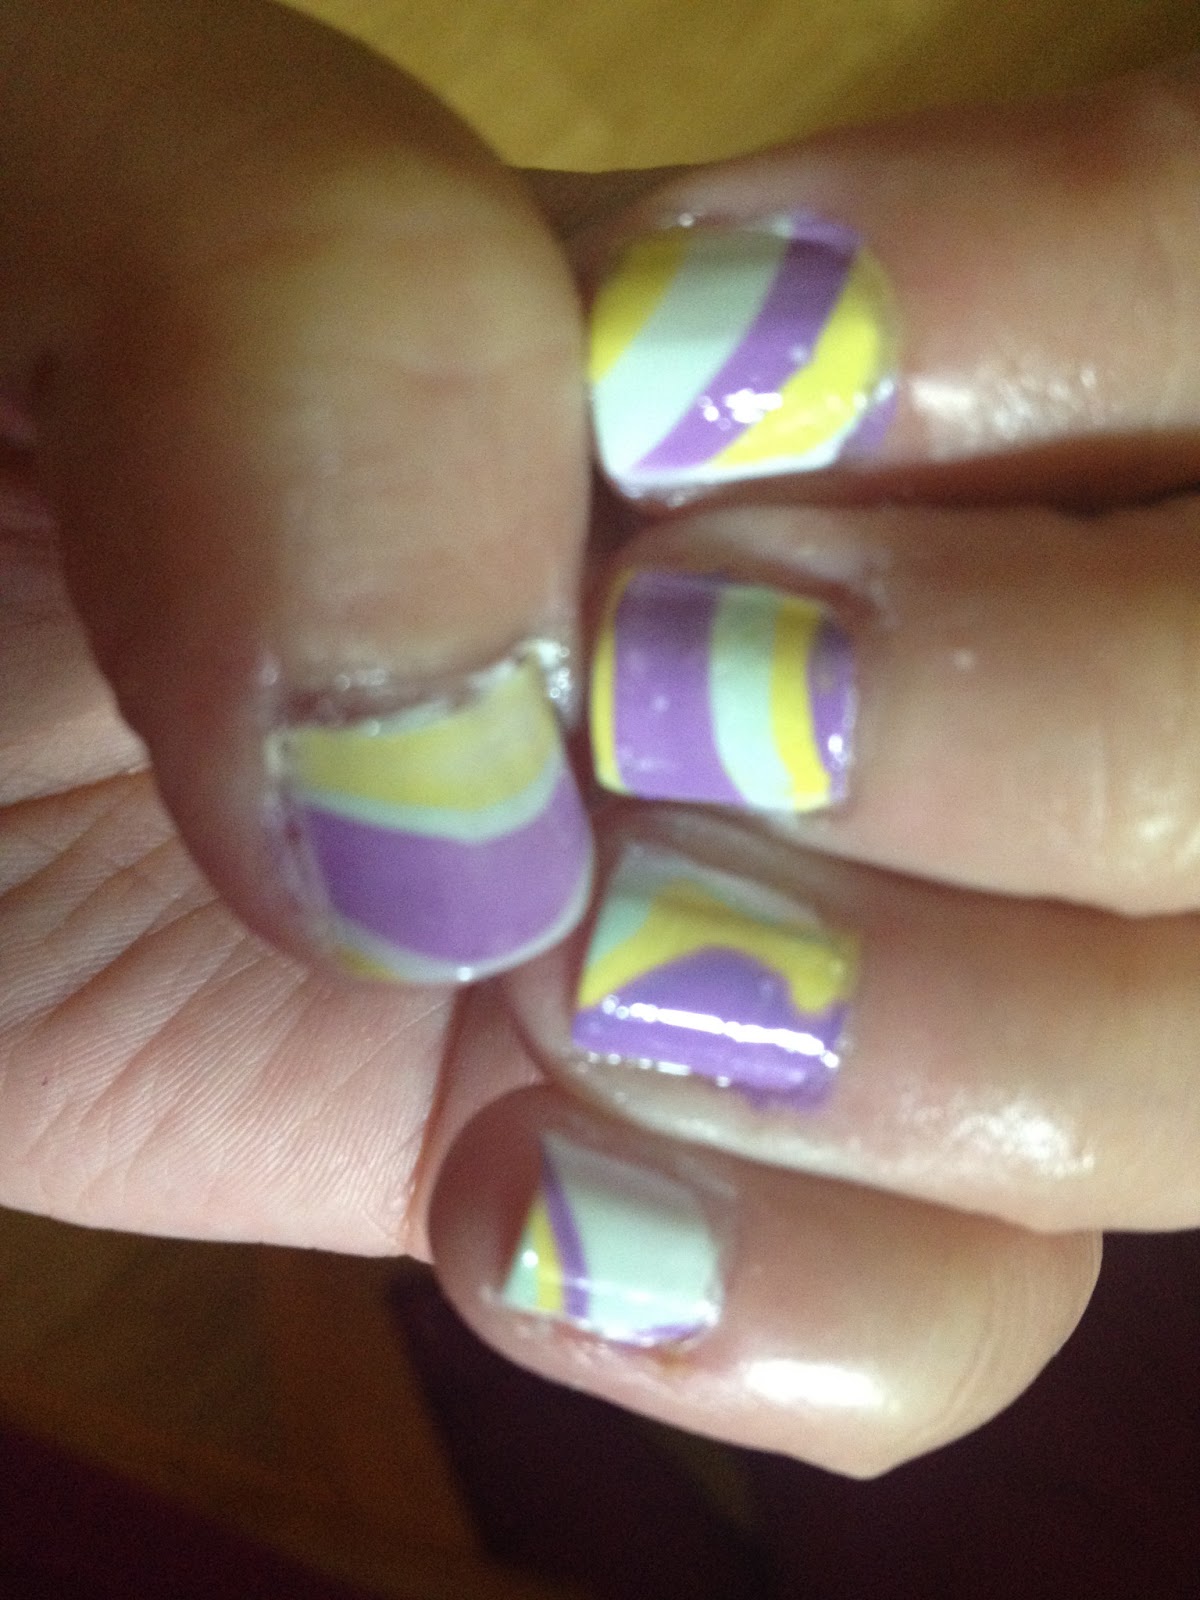
Base Color: OPI Alpine Snow
Yellow: OPI Fiercely Fiona
Purple: OPI Do you lilac it?
Green: OPI Gargantuan Green Grape
Tools
- A dollar store bowl
- Tooth pick
- Paper towels
- Scissor
- Scotch tape
Instructions and Tips
- Fill the bowl with room temperature water - no cold water, not warm either
- Apply Base coat
- Apply base color - OPI Alpine Snow and wait for it to try a little
- Question: Why do I need a base color?
- The water marble makes the layer of the color really thin. Without a base color, it does not look as good on the nails.
- Start making scotch tape strips
- Each nail will need 2 strips.
- One strip is used to cover the top; the second strip is used to wrap circular around the area from one side of the nail, bottom, and up to the other side and touch the other tape.
- Loose up the cap for the other three colors (yellow, green, and purple).
- Once the white coat is try, apply the tapes on the finger around the nail area
- Apply the tape strips exactly on top of the line if possible.
- If it's hard to decide, leave the strip a little away from the nail into the skin area.
- In general, the tape should stick to the skin around the nails.
- To stabilize the strips, you can make it completely stick to the skin as well.
- Question: How many nails should I do at a time?
- After quite a few experiments, 2 is recommended, at most 3 for beginners.
- Only tape 2-3 fingers at a time instead of all the fingers to make the marbles.
- Time to make the marbles in the water!
- Question: Which color should I start first.
- Recommend: Lightest color to darkest: yellow -> green -> purple
- I used green -> yellow -> purple. Yellow ends up looking light green.
- Drop colors in the water - *Very important tips*
- Make sure the brush from nail polisher bottle has enough nail polisher to make a drop but not too much to make 2.
- Dropping color must be fast.
- If the color is dropped to the water and it doesn't spread, tap the bowl to make it spread
- Drop next color in the center ASAP ; tap the bowl a little if it doesn't spread
- Alternate as fast as you can so the nail colors don't dry up.
- Once getting a lot layers in the water, time to stop.
- To make the pattern interesting, use the very tip of *pointy* toothpick to tap-swirl the colors up - do not stick the toothpick all the way into the water. It'll destroy the marble.
- Separate the fingers with tapes, and aim for the patterns desired.
- If the fingers are too close, it'll be different patterns
- Slide the fingers in at 45 degree angle to 70 degree into the water
- You can shake the finger a little if there's bubble on it.
- Blow dry the top layer, and use the toothpick to remove the entire layer on top.
- Stretch the fingers up and remove from the water.
- Blow dry the finger a little, and cut / remove the tapes off the finger.
- Use toothpick to clean up the rest of the nail polisher in the bowl for the next run
- Clean off the excessive from the finger with nail polisher remover/Q-tip.
- Once the nail is dry, apply top coat and drip dry.
No comments:
Post a Comment